· JS · English · 4 min read
Site Preparation for EL Inspection of PV Modules After Delivery
A guideline to prepare the site for a daylight EL inspection, ensuring an efficient workflow and having the site organised afterwards in the interests of the site owner.
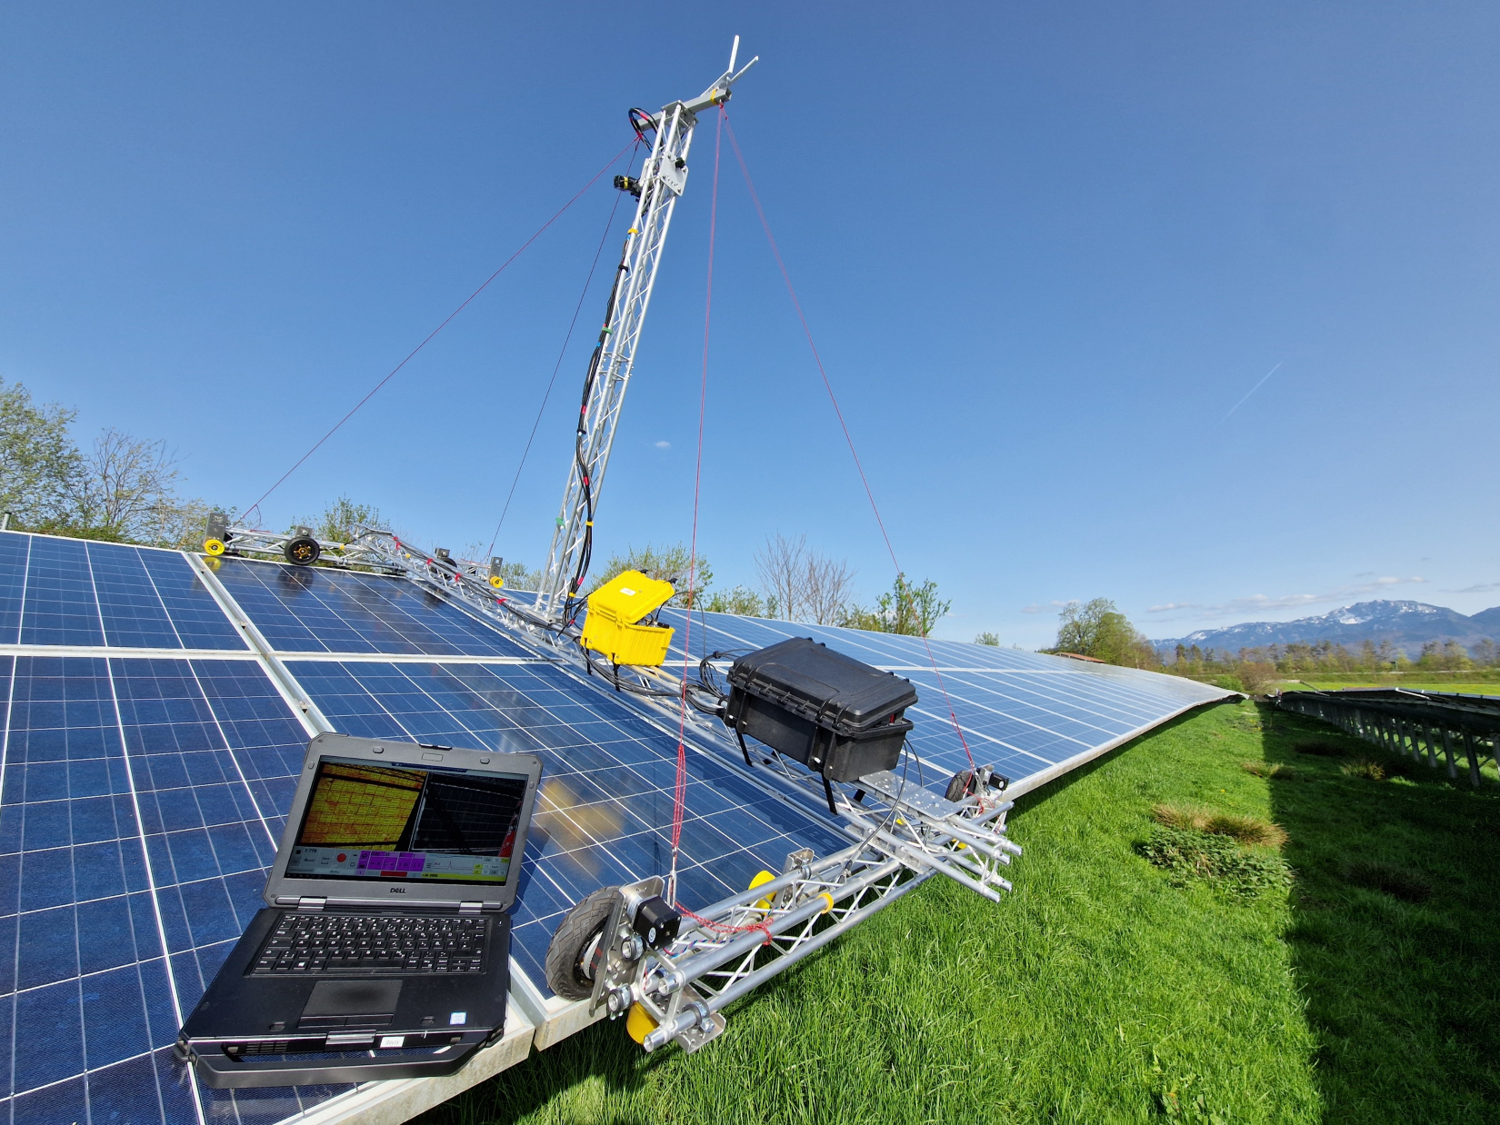
Electroluminescence (EL) inspection is a crucial step in ensuring the quality and performance of photovoltaic (PV) modules upon delivery. Using our daylight EL technology DaySy, allows for high-throughput inspection without requiring a dark environment like a container. The process can handle up to 500 modules per day under optimal conditions, providing detailed defect categorization and IV curve extraction. Proper site preparation significantly enhances efficiency and accuracy while reducing potential delays. Additionally, the site owner benefits from an organized site after the inspection.
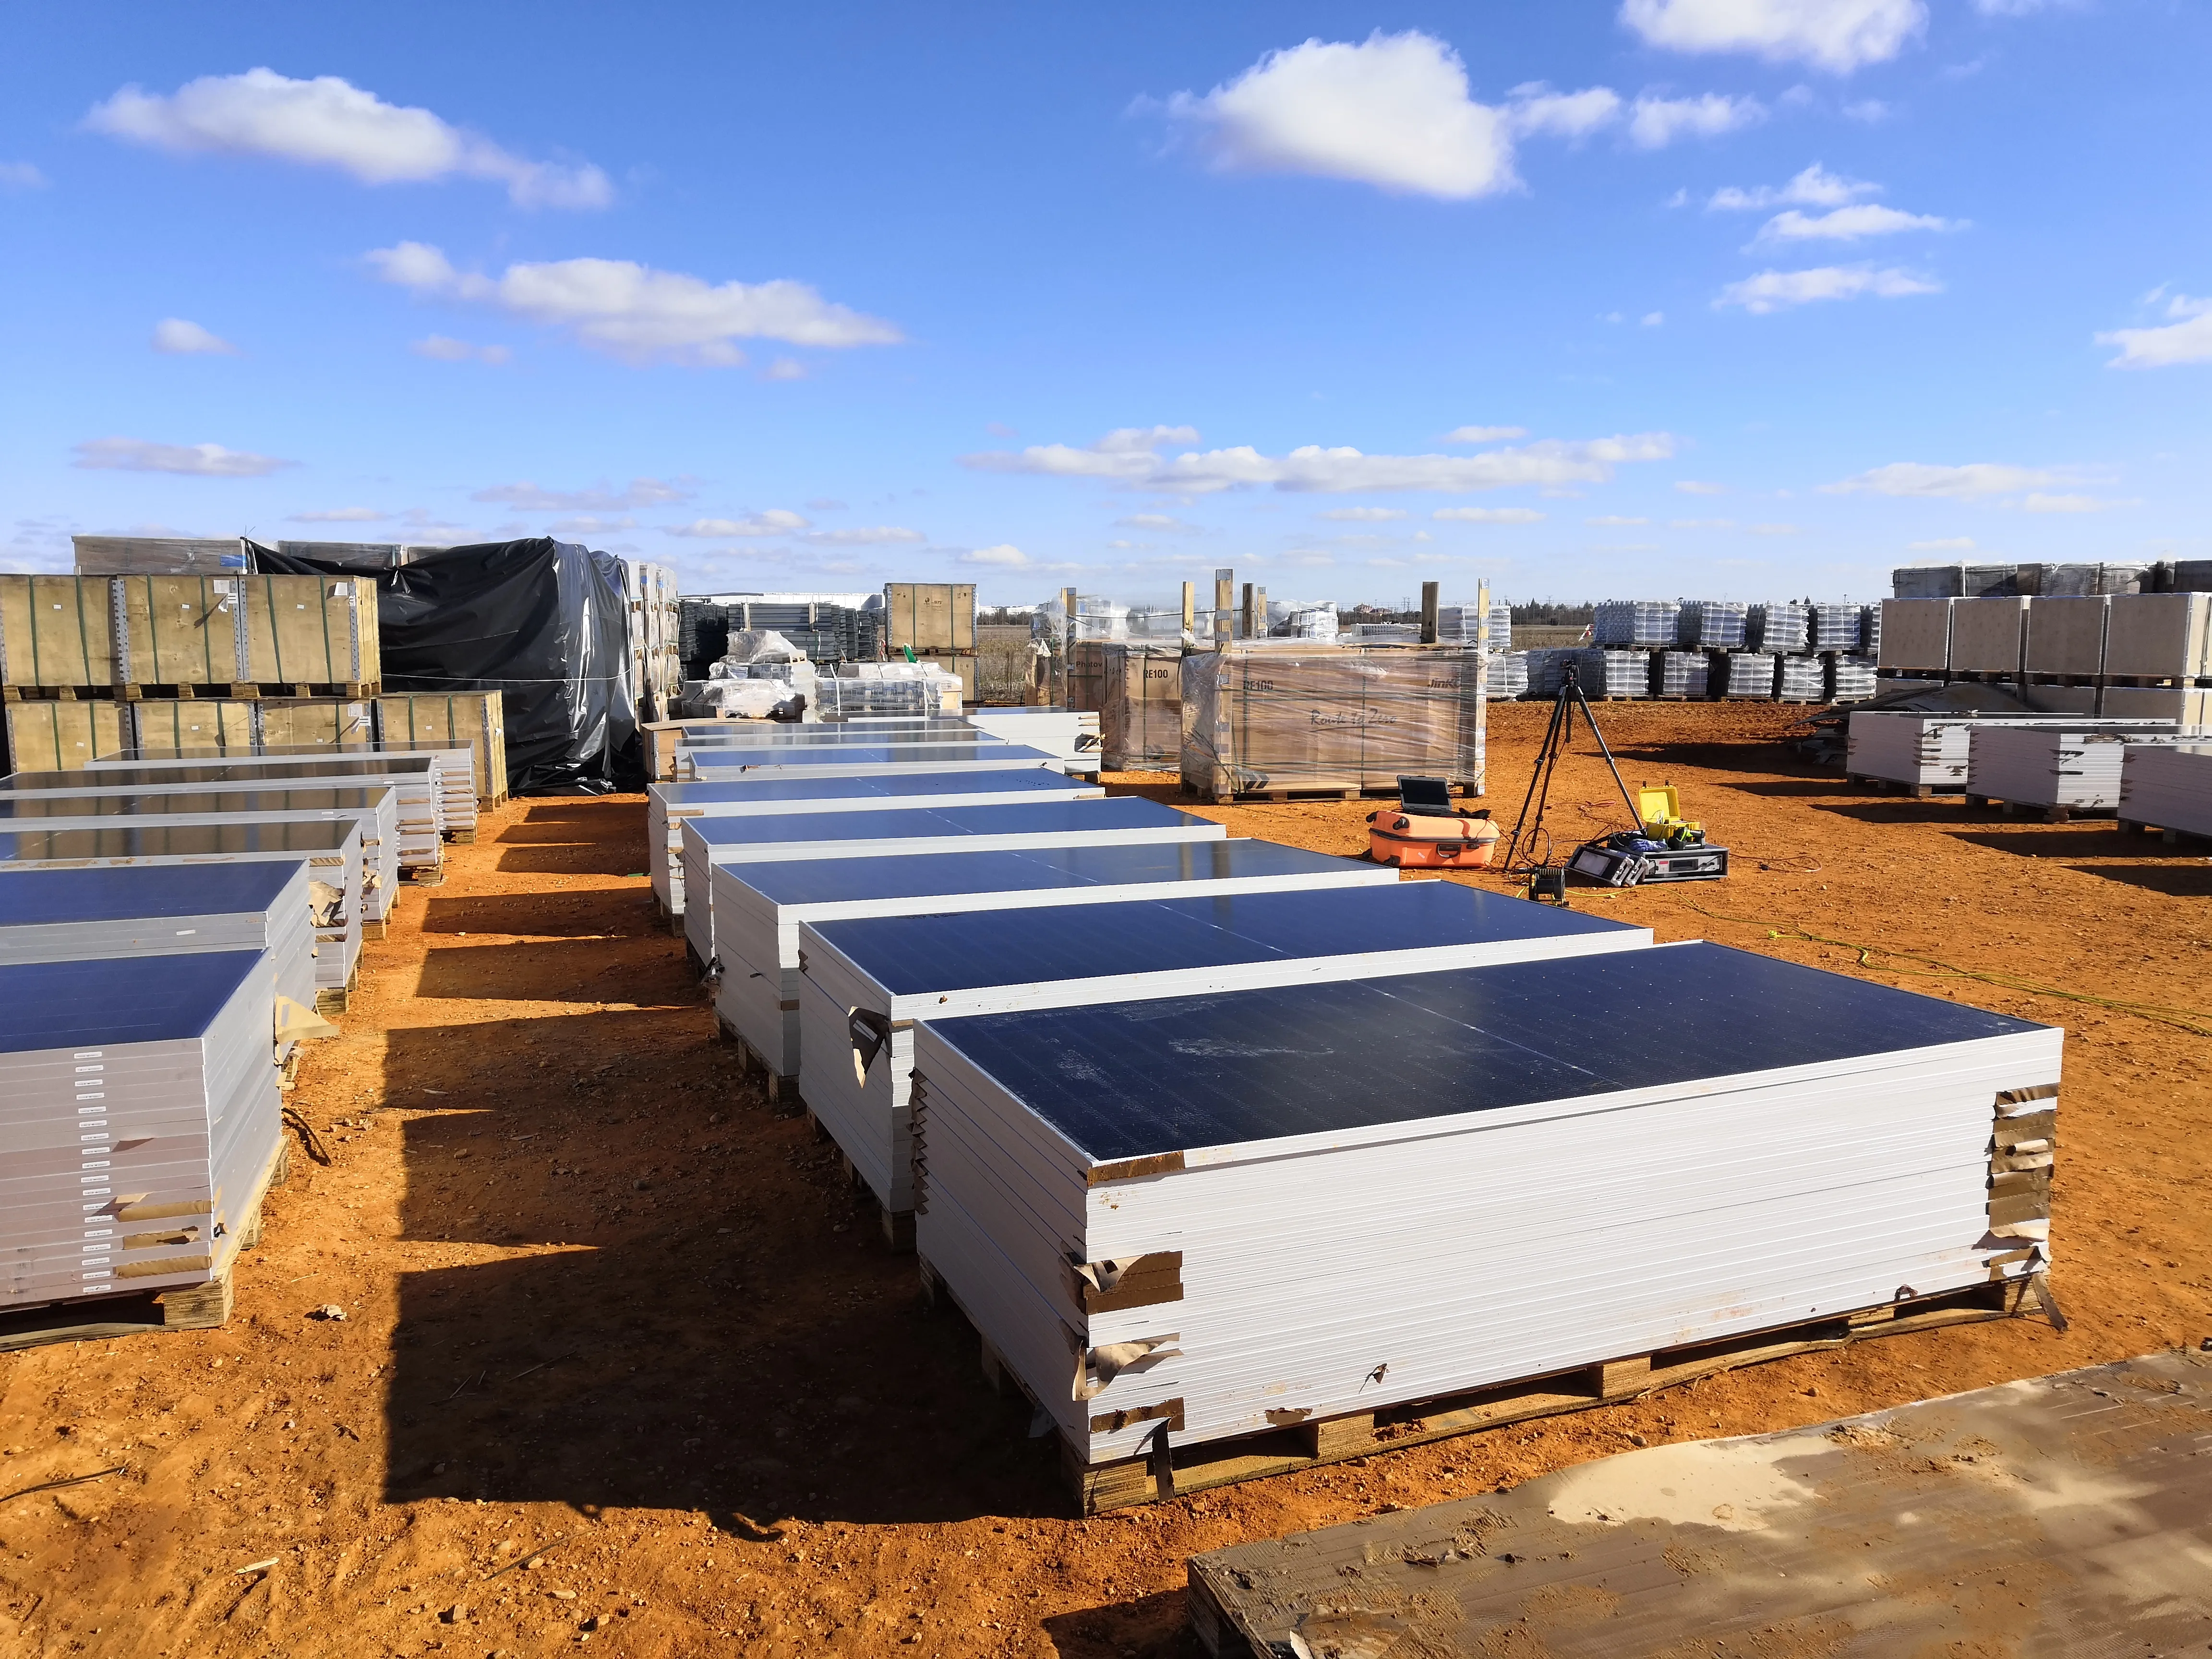
Setup of the DaySy Equipment
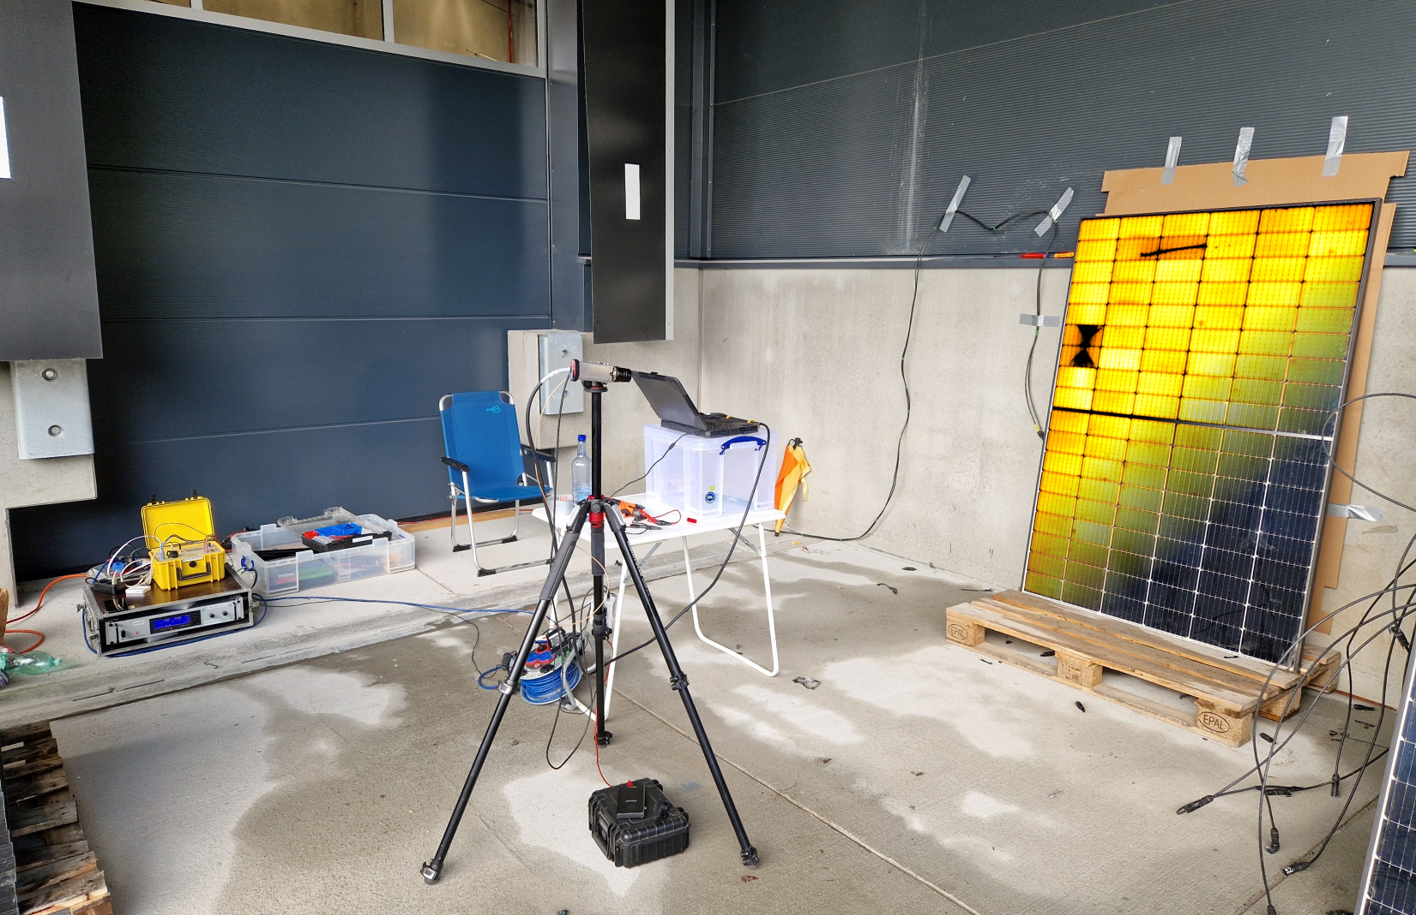
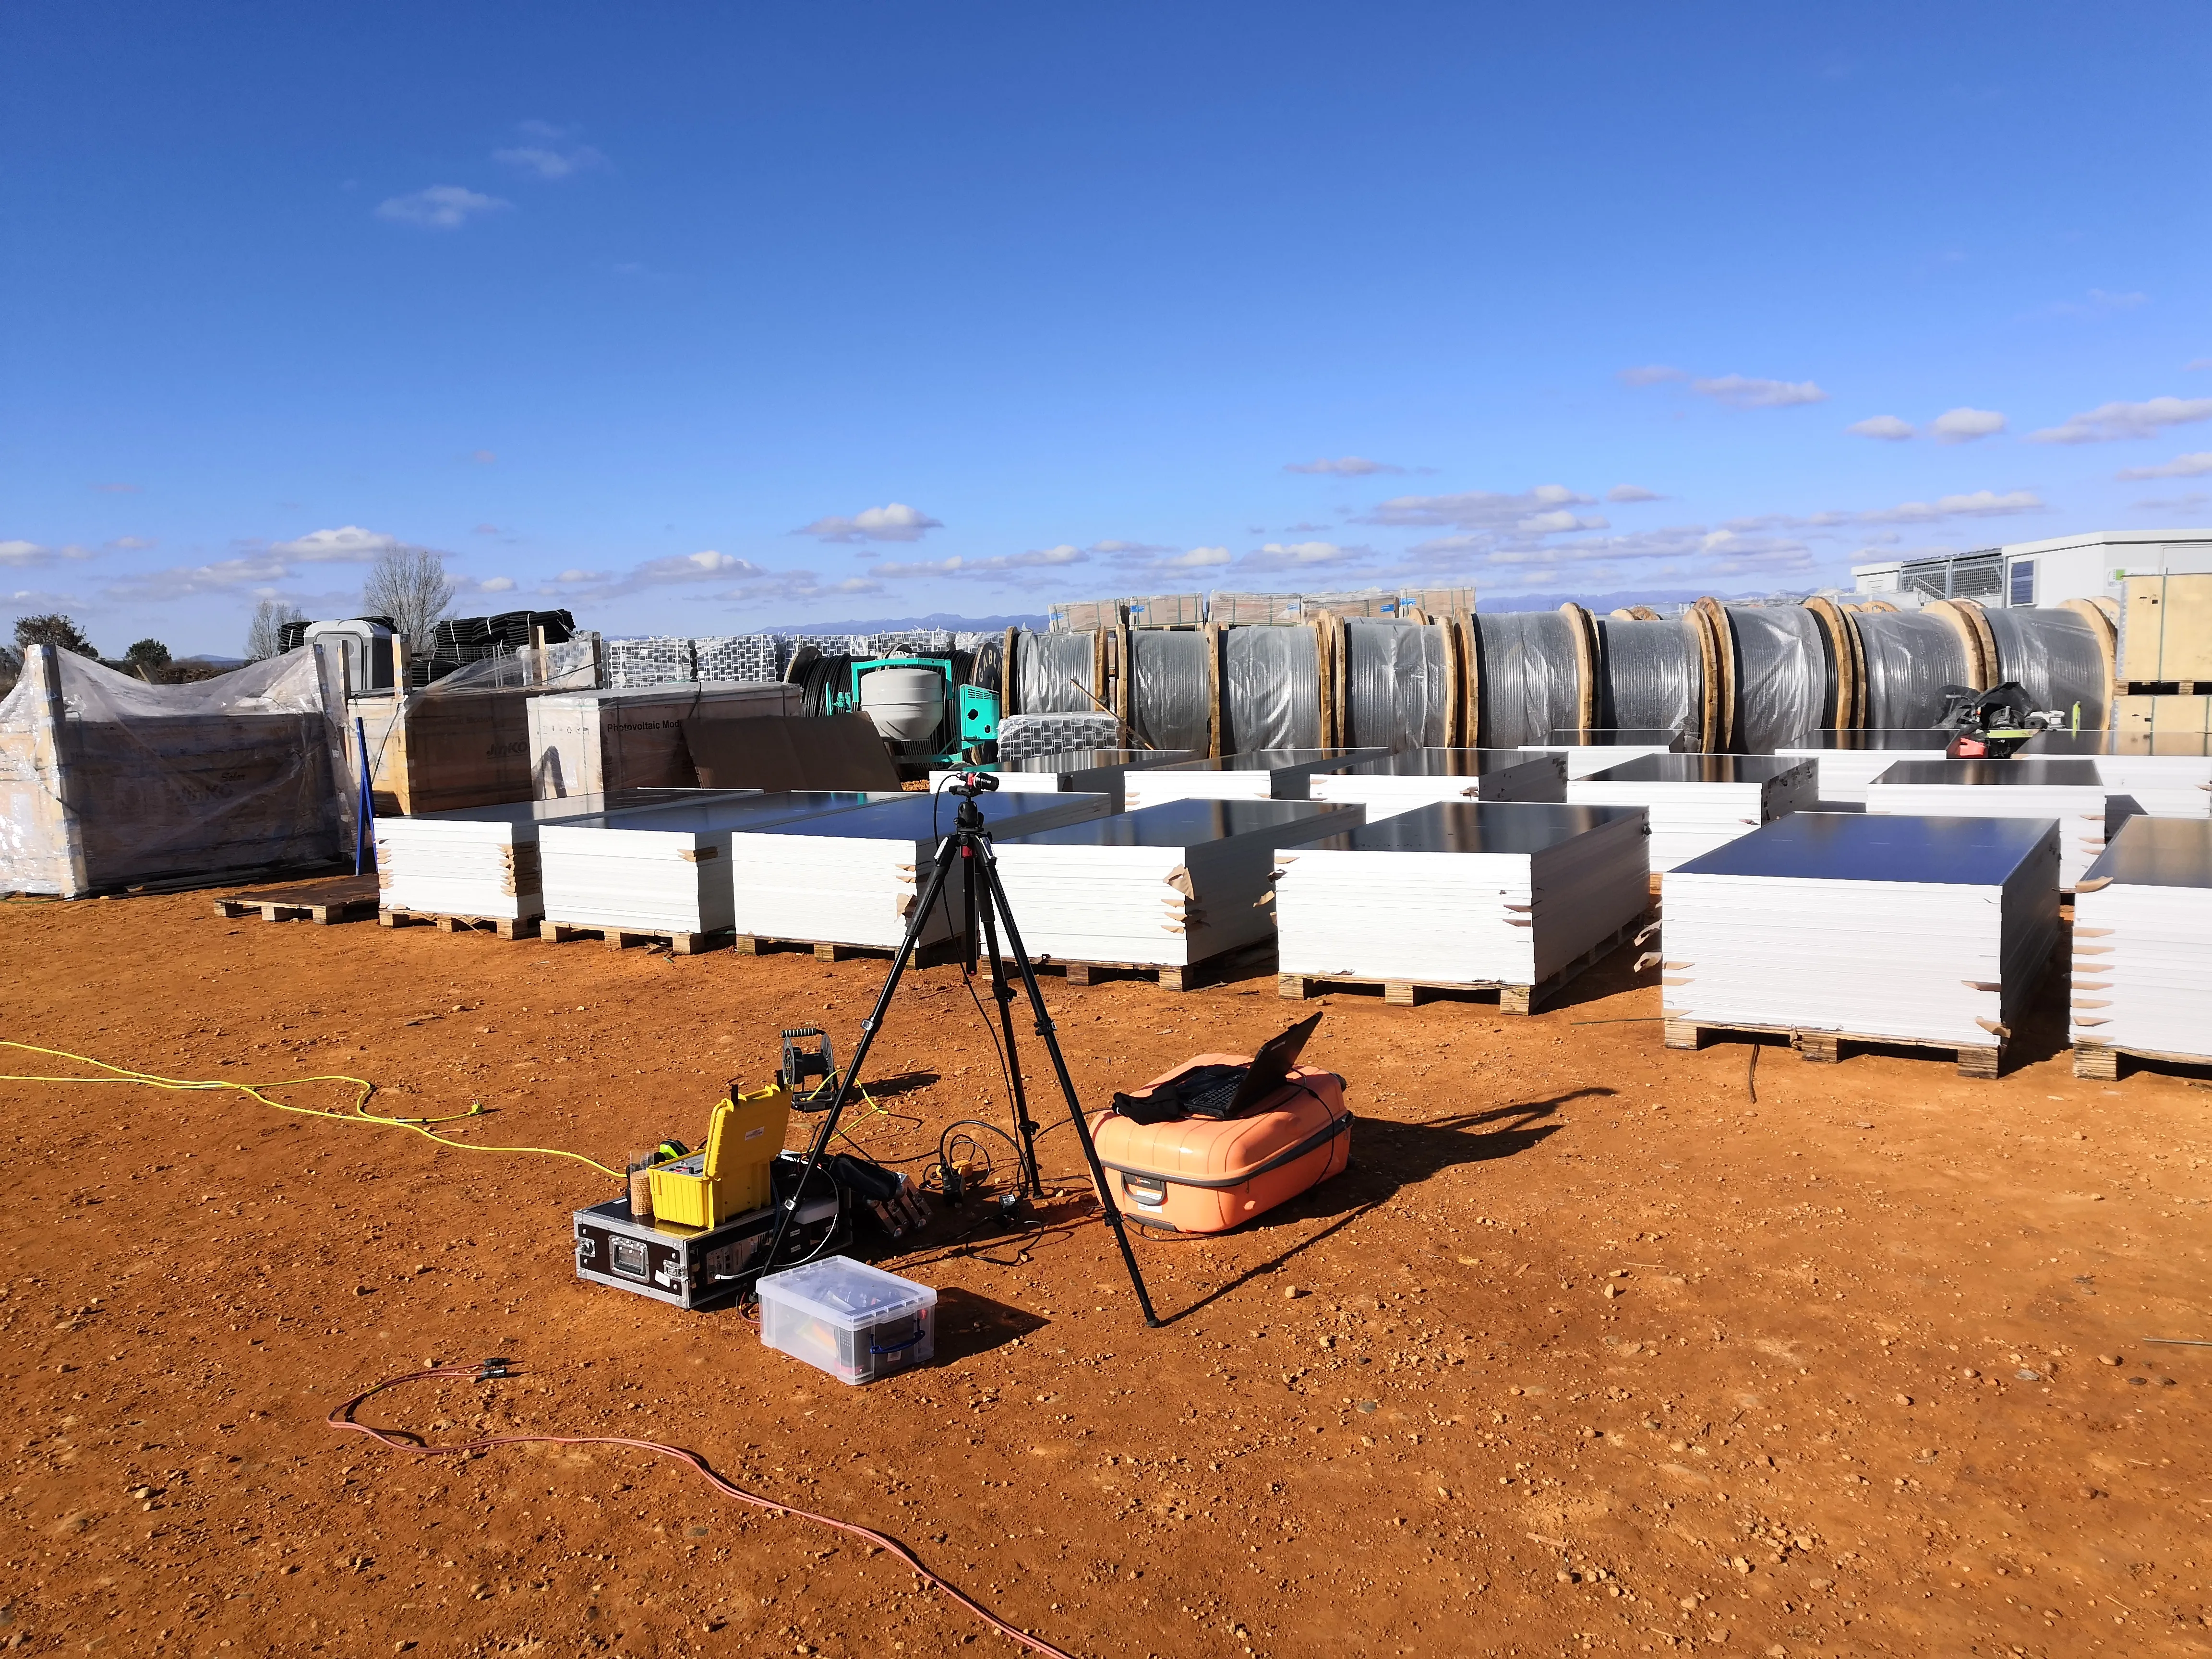
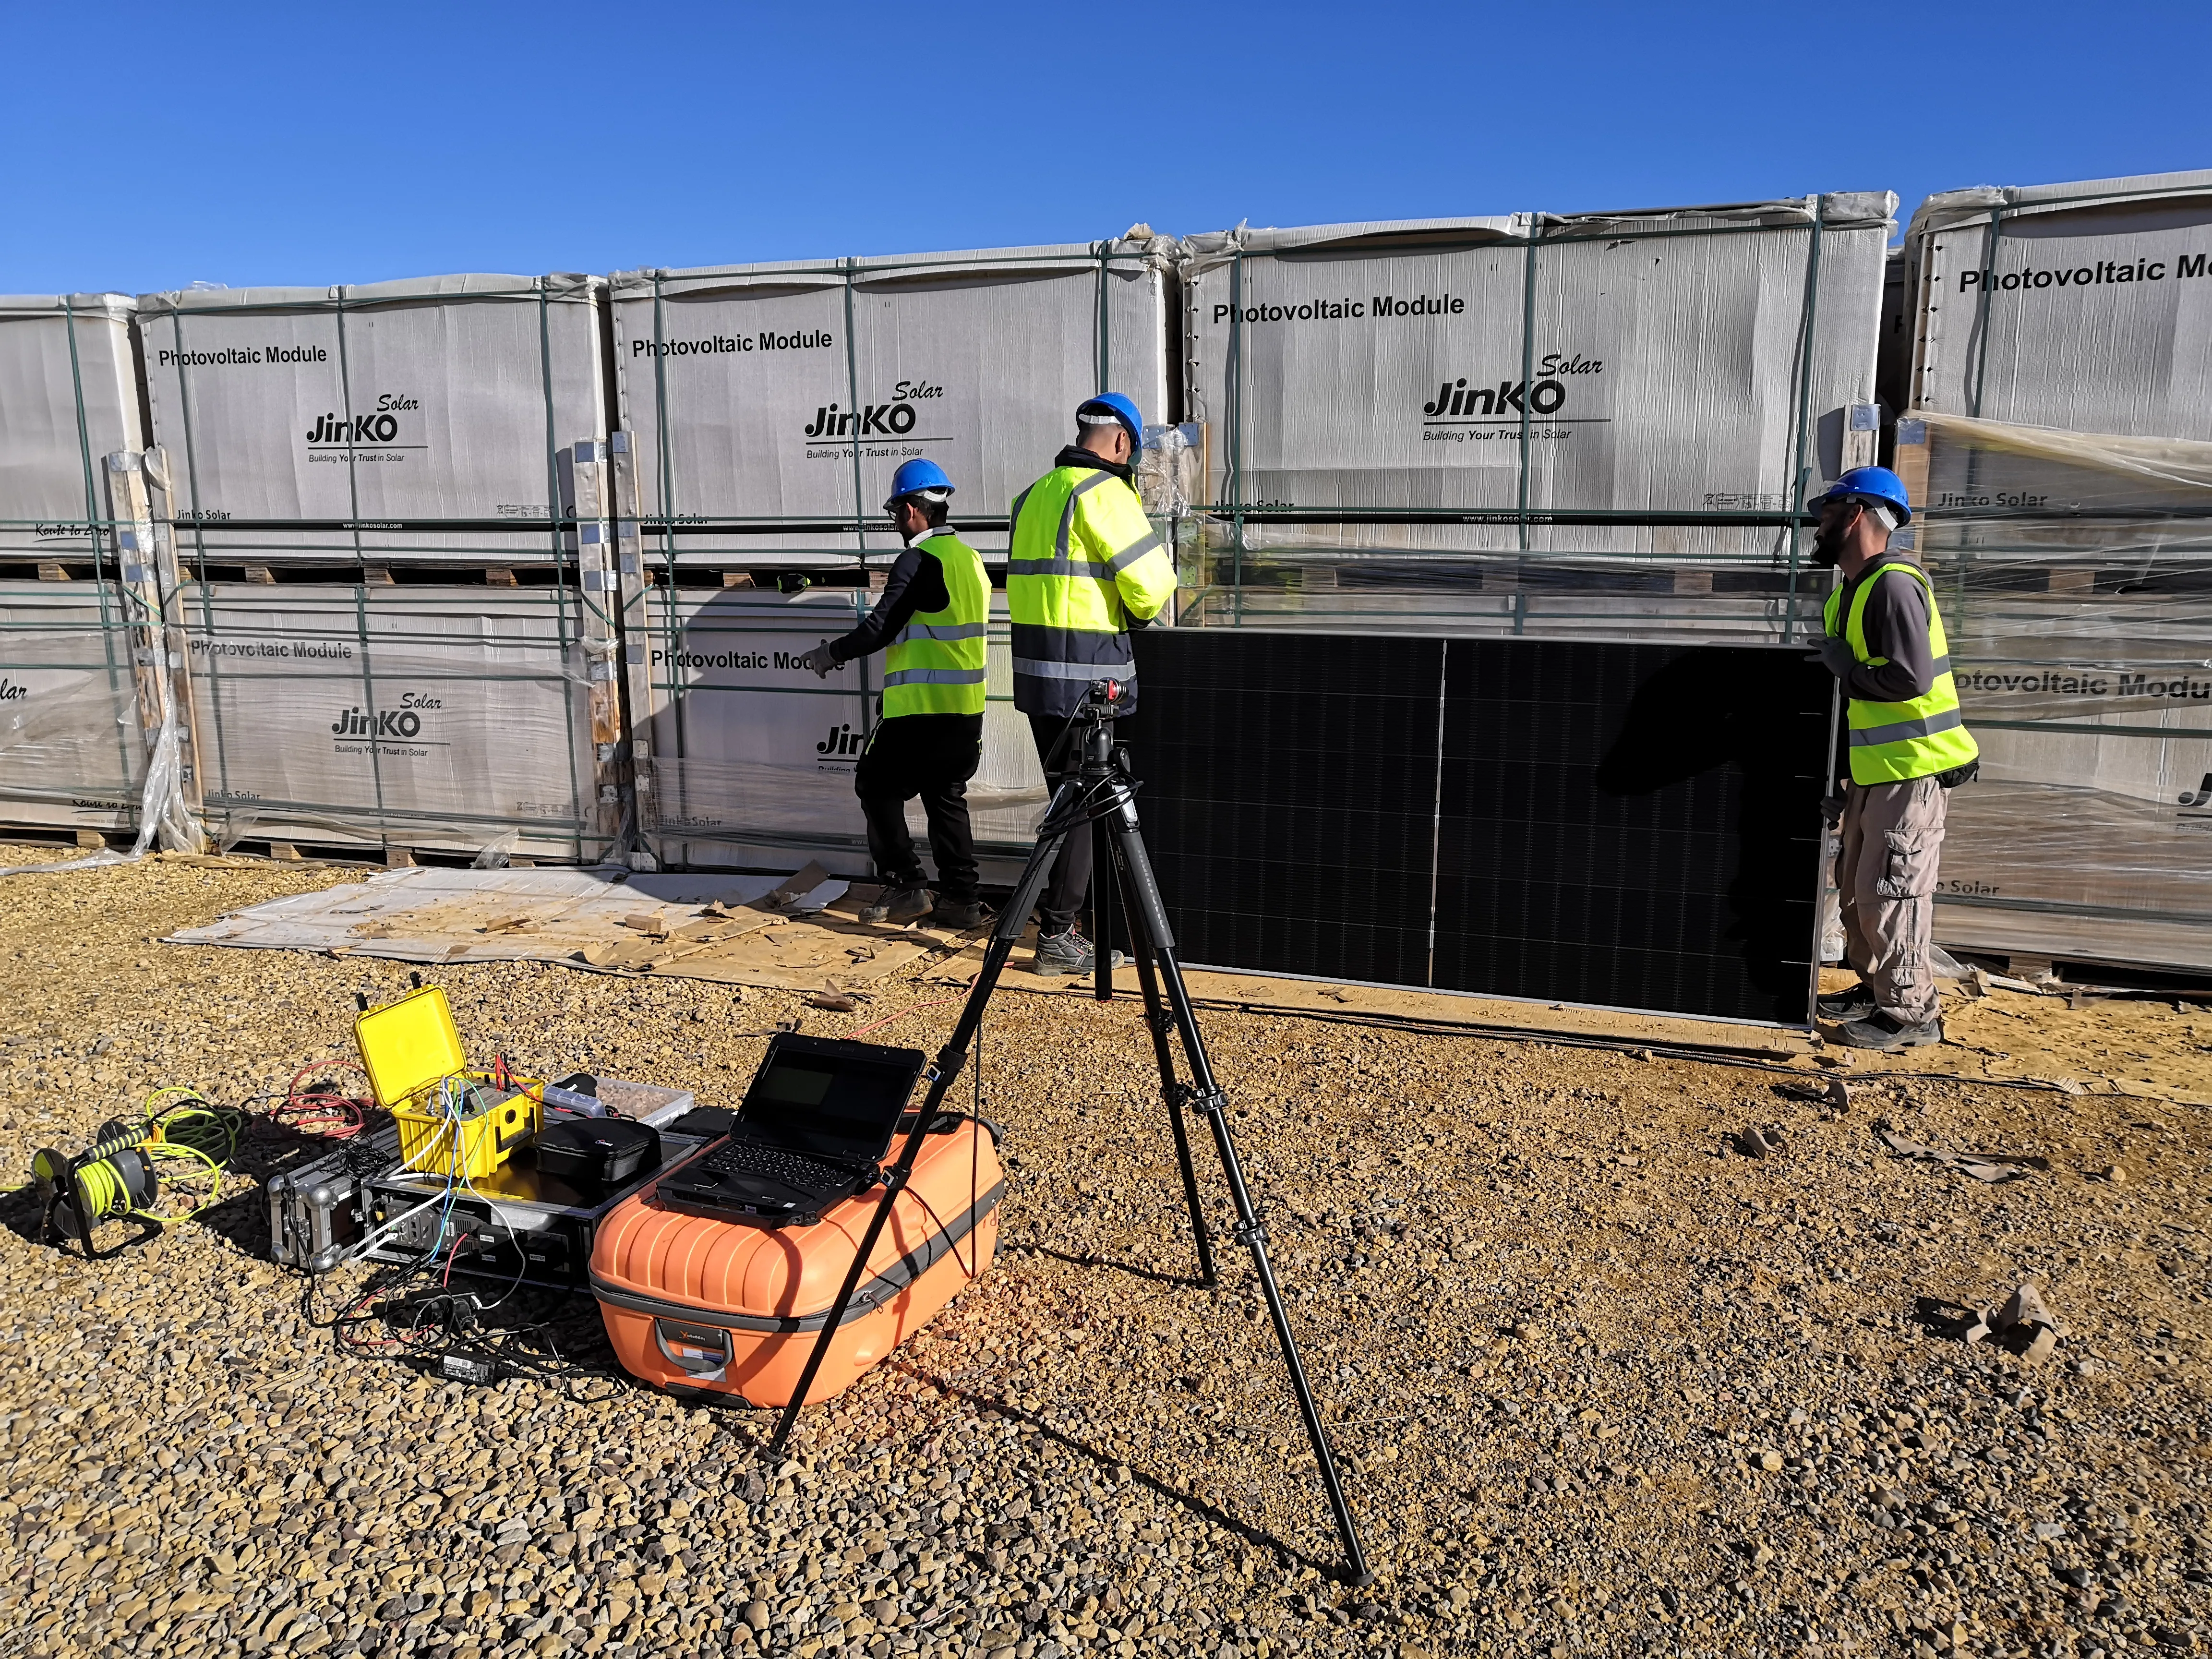
The DaySy EL system requires careful setup before starting the inspection. The inspection area must be at least 3x3 meters and equipped with a stable power source (230V outlet or generator). Additionally, the imaging equipment should be protected from environmental factors such as rain or excessive dust. The setup process includes:
- Position the camera on a tripod on stable, flat ground.
- Supply the DaySy system including the current source with 230 V.
- Connect the camera with our software and adjusting the focus, aperture and exposure time
- Establish an organized workflow to facilitate module movement and minimize handling time.
Inspection Loop
The EL inspection follows a structured workflow loop to maximize throughput:
- Unpack and prepare modules – Modules are carefully removed from pallets by a two-person team.
- Transport to inspection area – Two workers carry the module to the “photo spot”.
- Capture the image – One person connects the module via MC4 connectors, another scans the barcode, and the operator captures the EL image.
- Evaluate and categorize – The operator assesses the EL image and assigns a defect category (A/B/C classification).
- Relocate module – The module is then carried to the loading area and stacked onto an empty pallet.
- Repeat process – The cycle continues to maintain efficiency and meet daily throughput goals.

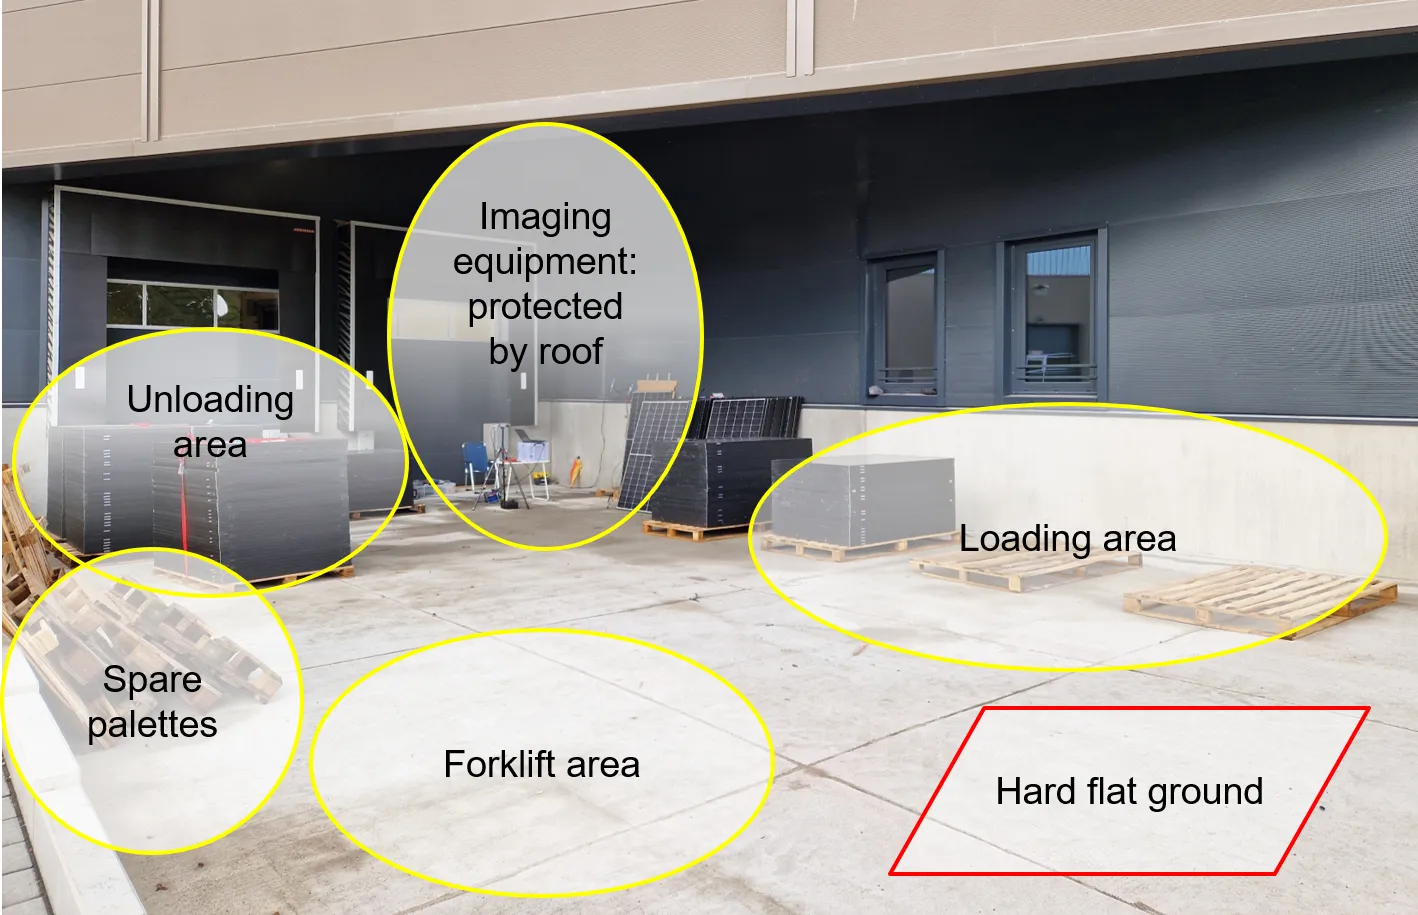
Optimal Site Setup
To ensure smooth operations, an optimal site setup includes:
- A 10x10m workspace to accommodate all activities.
- Dedicated areas for unloading, imaging, loading, and forklift operation.
- A covered imaging station to protect equipment and maintain consistent image quality.
- Hard, flat ground for stability and ease of movement.
- A staging area to organize module pallets and facilitate workflow.
Required Site Preparation
For an efficient EL inspection, the following preparations must be made:
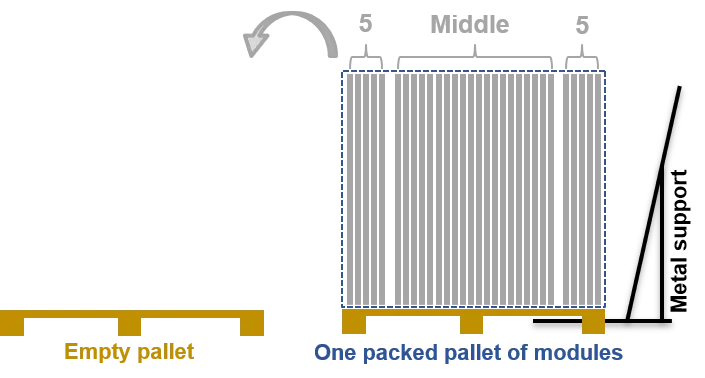
- Pallets of modules should be placed horizontally and unpacked near the measurement area.
- Measurement area should be flat, solid, and at least 3x5 meters with a wall or support structure for leaning modules.
- Sufficient empty pallets should be available for stacking inspected modules.
- A reliable power supply (230V) must be accessible.
- At least four workers should be assigned to the process, with at least one English or German-speaking contact for coordination.
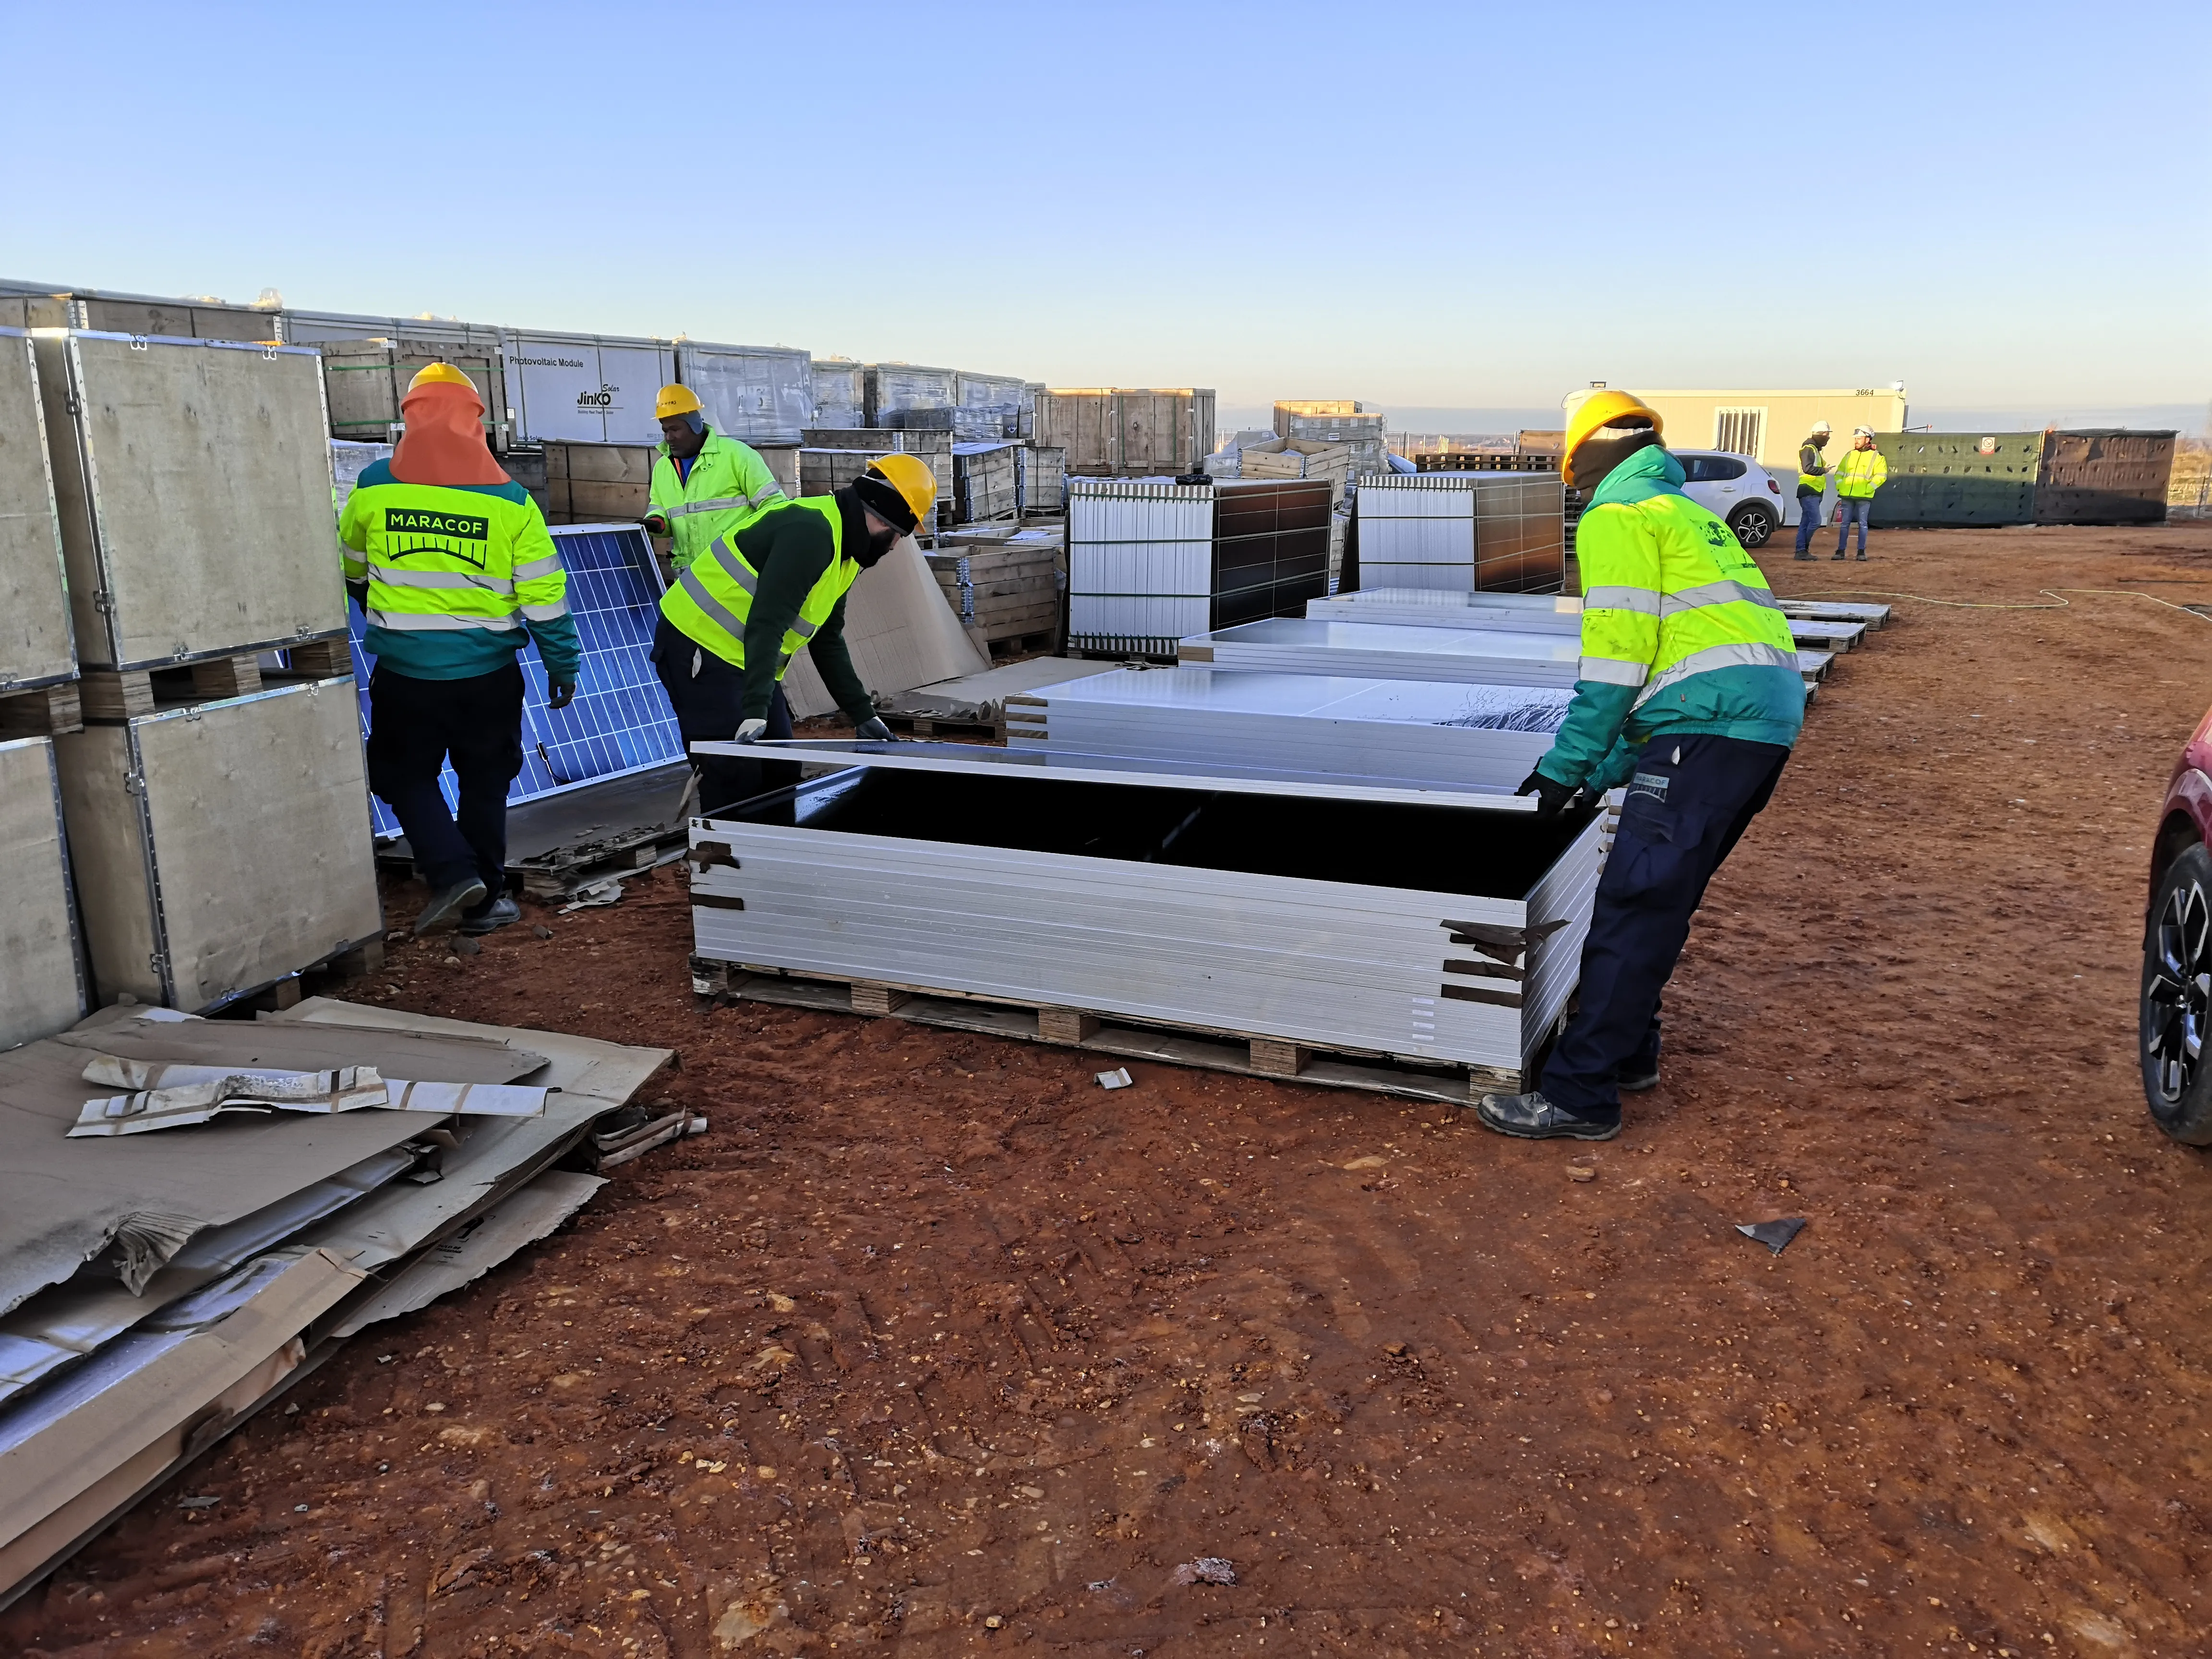
Procedure if the Pallets are still Factory-Packed
If modules are still packed, as delivered from the factory, additional preparations and time are required:
- Metal supports must be provided to lean modules against.
- Two extra workers are needed to handle unpacking and repacking.
- Throughput reduction – With unpacked pallets, the inspection rate drops to approximately 200-250 modules per day (compared to 500 modules when pre-unpacked).
- Additional storage space is necessary for opened pallets and module handling.

After EL Inspection
Post-inspection, proper organization ensures module safety and traceability:
- With proper preparation – Inspected modules are neatly stacked on empty pallets, and workflow remains coordinated, ensuring solid ground conditions.
- Without preparation – Modules may be improperly stored, leading to potential damage due to unstable stacking or muddy ground conditions. Therefore, even more additional time must be spent on site to ensure safe storage conditions.
- Final documentation and reporting – The defect categorization, barcode scanning results, and EL images are compiled for quality assessment and client reporting.
By ensuring a well-prepared site, EL inspection of PV modules can be conducted efficiently, reducing downtime, preventing damage, and guaranteeing high-quality module deployment.